SystemMen - Create the first repository on Gitlab. In this article, I will guide you to create your first project. This will be where you store the code for your first project.
Register for a free account on Gitlab
First, you need to access this link and register for a free account.
For personal use, store individual projects or simply want to learn to use Git and Gitlab. A free account is enough for you to use.
Create a repository on Gitlab
After you have an account, log in to the system.
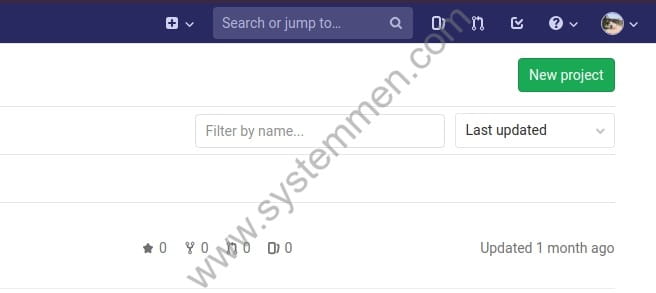
Click the New project button in the upper right corner as shown in the image below.

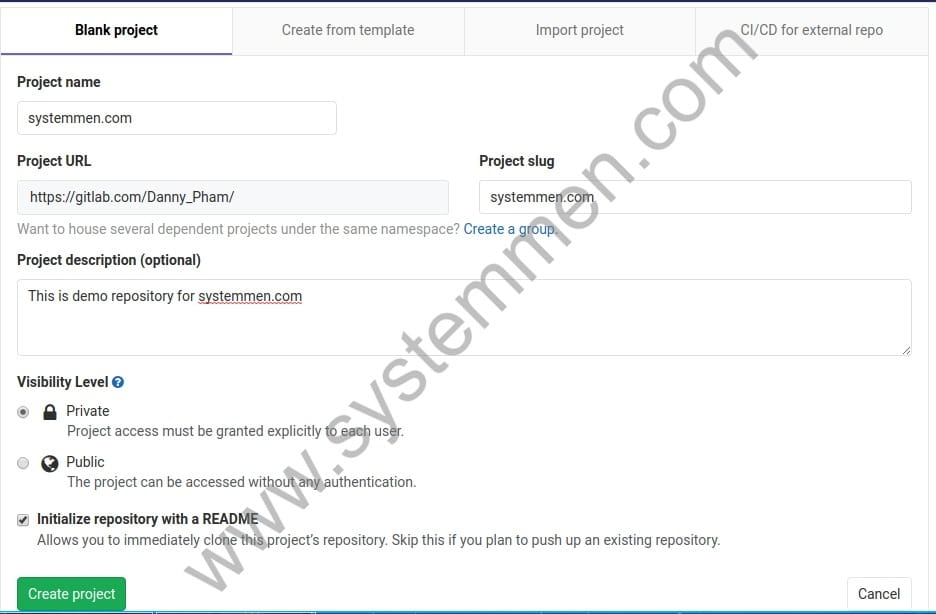
Next, you will name the name of the repository you want to create, fill in the description for this repository.

Here, you will see two options are Private and Public.
- Private: only you or your authorized members can access this repository.
- Public: everyone can access this repository without authentication. Most open source projects use Public, because they want to receive contributions from the community.
The README file is a file that can be said as a brief document of the project. You can choose to create the file automatically and change the content later. Or you don’t choose to create it automatically, you can create it later.
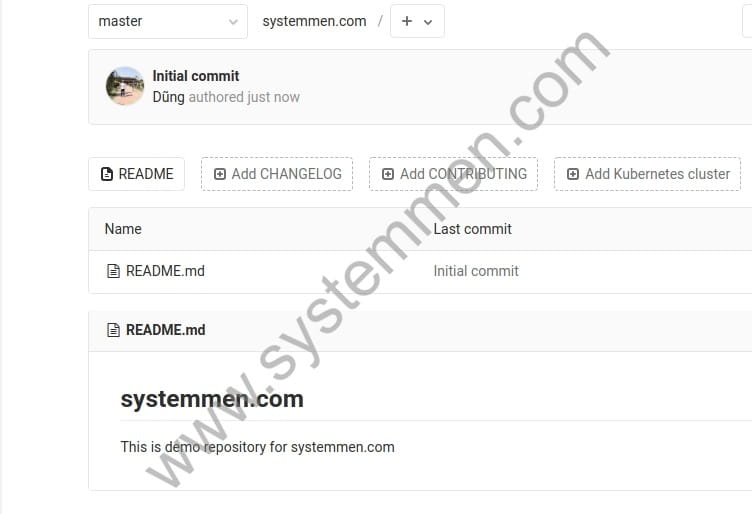
After you click Create project, you will see the window like image below, so you have successfully created a repository for your first project.

Conclusion
In the framework of this article, I only guide you how to create a Gitlab repository just like that. In the next article, I will show you how to use Git and store code on it.
«« How to install GIT version control system?Git clone repository to your computer »»


